How to Test
This guide explains how to test data flow via X-Road between the Bank and SRC using the SRC Test Console or direct API calls.
Intro
a. Before testing, the bank may deploy the API mockup example on their side and make it accessible to the Bank's X-Road Security Server.
or
b. Bank can provide own software, which provides same API specs described in API Documentation and make it accessible to the Bank's X-Road Security Server with proper OpenApi specification. In this case, you can skip software deployment steps and go directly to Step 2.
Step 1: API mockup guide
Prerequisites
| Requirement | Details |
|---|---|
Python 3.12+ | Python 3.12 or higher must be installed |
pip | Python package manager (comes with Python) |
Git | To clone the repository |
Docker (optional) | If you prefer running via Docker instead of Python directly |
1.1 Clone the Repository
Get the API mockup example repository onto your server:
git clone git@github.com:InformationSystemsAgency/bank-declaration-api-mockup.git
cd bank-declaration-api-mockup
1.2 Choose Your Setup Method
You can set up the application using either a local Python environment or Docker.
Option A: Local Python Setup
1.3 Create a Virtual Environment
Isolate the project dependencies in a Python virtual environment:
# Create the virtual environment
python3 -m venv venv

# Activate it
# On Linux / macOS:
source venv/bin/activate

# On Windows:
venv\Scripts\activate
Alternatively, use the provided setup script which handles this automatically:
chmod +x setup_env.sh
./setup_env.sh
1.4 Install Dependencies
Install all required Python packages:
pip install -r requirements.txt
This installs: Flask, Flask-CORS, PyYAML, Gunicorn, and python-dotenv.
Option B: Docker Setup
Alternatively, if you have Docker installed, you can skip the Python setup above and run:
# Build and start the container
docker compose up --build -d
The server will start on port 8080. Skip to step 1.5 to configure your environment variables.
1.5 Configure Environment
Copy the example environment file and edit it for your bank:
# Copy the example config
cp .env.example .env

# Edit with your settings
nano .env
Or use the interactive setup script to generate it:
chmod +x setup_env.sh
./setup_env.sh
Key settings to configure in .env:
| Variable | Default | Description |
|---|---|---|
PORT | 8080 | Port the server will listen on |
HOST | 0.0.0.0 | Bind to all interfaces so external connections work |
FLASK_DEBUG | false | Set to true only during development |
LOG_LEVEL | INFO | Logging verbosity: DEBUG, INFO, WARNING, ERROR, CRITICAL |
LOG_FORMAT | detailed | Log output format: simple, detailed, or json |
SESSION_TTL_MINUTES | 30 | How long sessions remain valid |
RATE_LIMIT_MAX_REQUESTS | 10 | Maximum requests per rate-limit window |
1.6 Run the Server
Option A: Using the start script
chmod +x start.sh
./start.sh
This script automatically sets up the virtual environment, installs dependencies, and starts the server.
Option B: Direct
python run.py
The server will start on http://0.0.0.0:8080 by default.
Option C: With Gunicorn
gunicorn --bind 0.0.0.0:8080 --workers 4 "app:create_app()"
Option D: With Docker
docker compose up -d
1.7 Verify the Setup
Confirm everything is running correctly:
# From your server (local check):
curl http://localhost:8080/
If the setup is correct, you should see the API info page or a JSON response.
Step 2: Connect to X-Road Security Server
After your Bank Data API service is deployed and running, you must register it as a service in your bank's X-Road Security Server so that the SRC can reach it through the X-Road infrastructure.
Prerequisites
| Requirement | Details |
|---|---|
| X-Road Security Server | Access to your bank's Security Server admin interface |
| Registered bank client | Your bank must already be registered as a member in X-Road |
| Running Bank Data API | The service from Step 1/2 must be running and accessible from the Security Server |
2.1 Access Your Bank Client
1 Go to your Security Server's admin dashboard.
2 Click Clients in the navigation menu.
3 Find your bank client in the list.

2.2 Add Subsystem
1 Click the Add Subsystem button.
2 Fill in the fields:
| Field | Value |
|---|---|
| Subsystem Code | SRC-DECLARATION-PROVIDER-TEST-APP |
| Subsystem Name | SRC DECLARATION PROVIDER TEST APP |
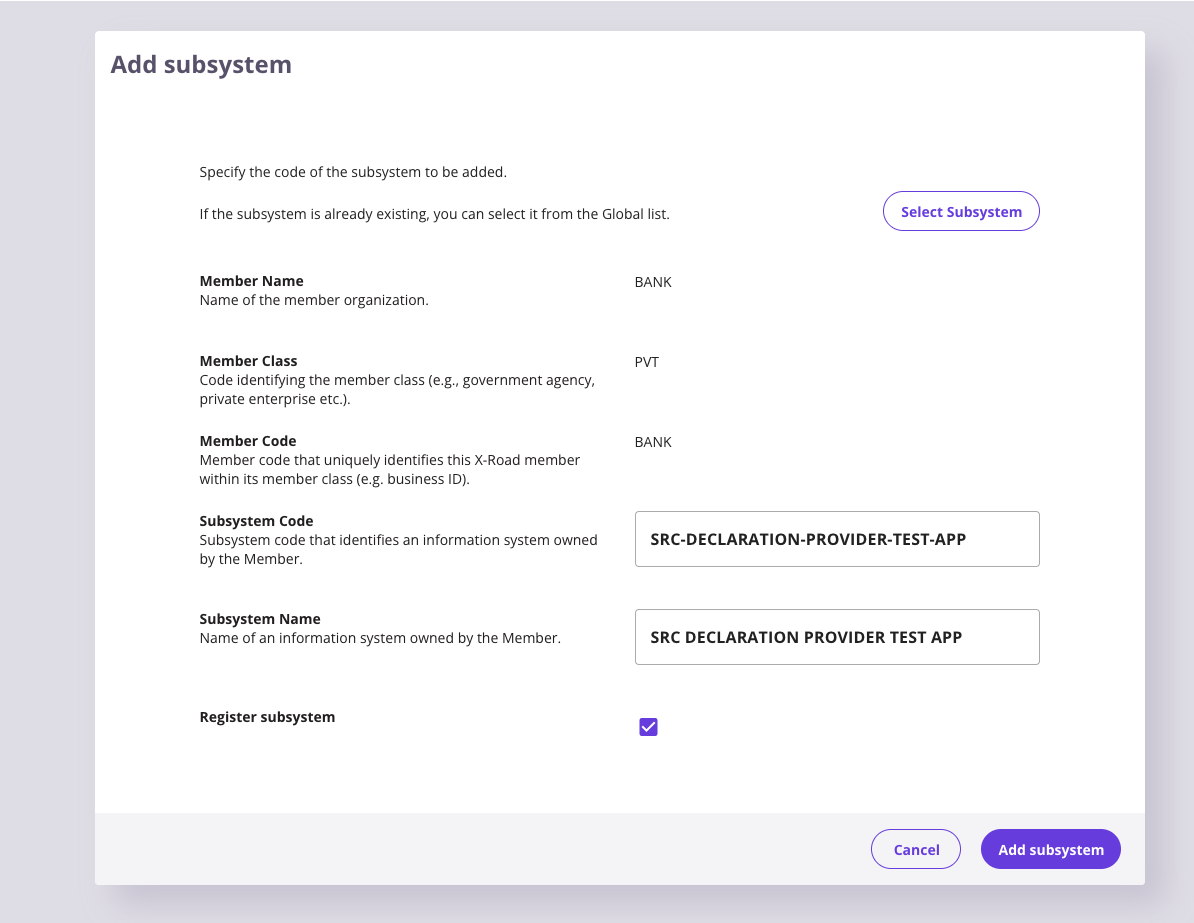
3 Click Add to create the subsystem.
After adding, you will see the new subsystem listed under your bank client.
2.3 Add REST Service
1 Click on your newly created subsystem to open the Subsystem Details page.
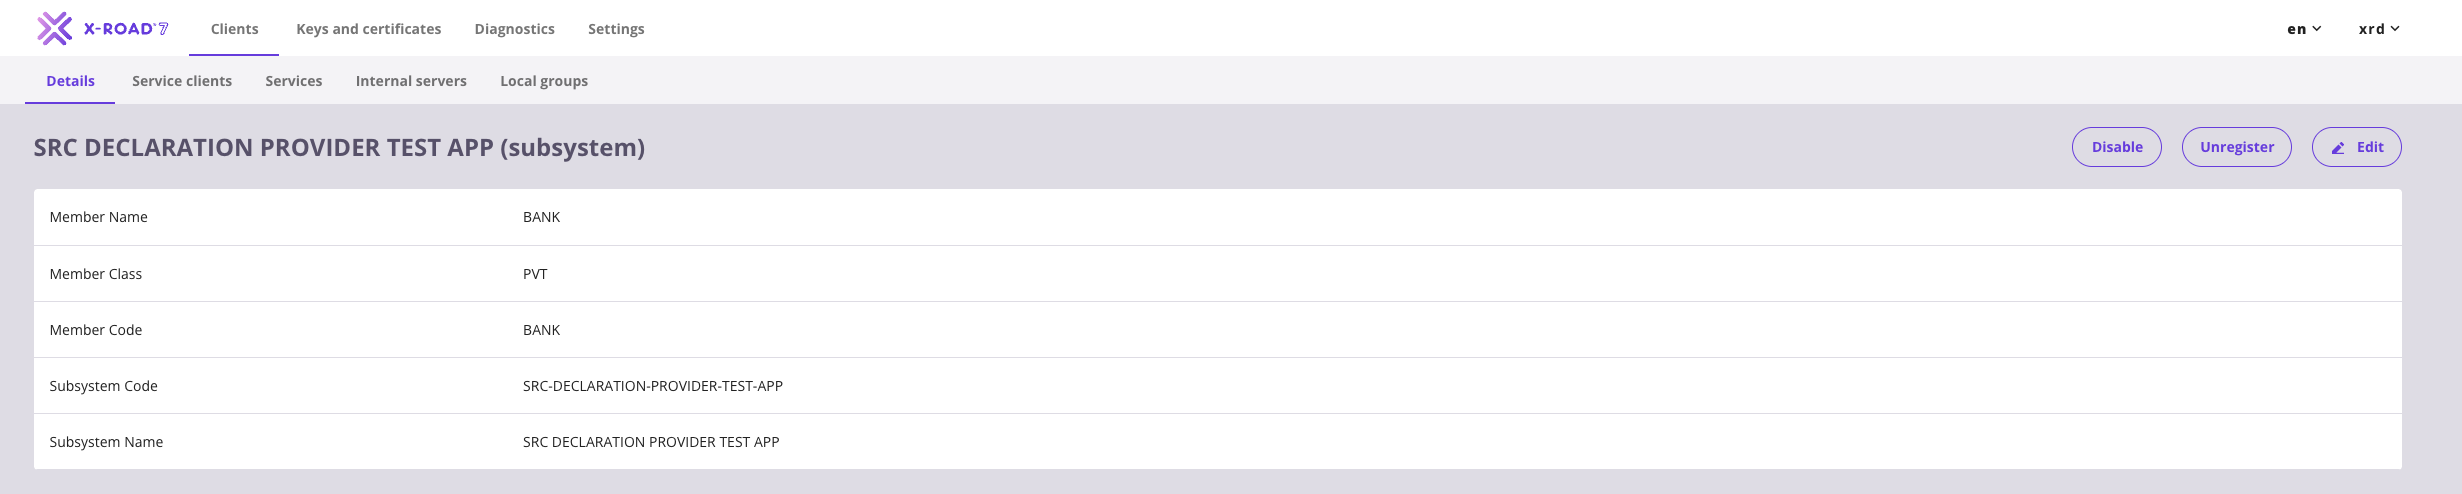
2 Go to the Services tab.
3 Click the Add REST button.

2.4 Configure the REST Service
1 In the opened window, fill in:
| Field | Value |
|---|---|
| URL Type | Select OpenAPI 3 Description |
| Service OpenApi file endpoint | Your OpenAPI specification (e.g.
http://<service-endpoint>:/openapi.yaml) |
| Service Code | BankingData |
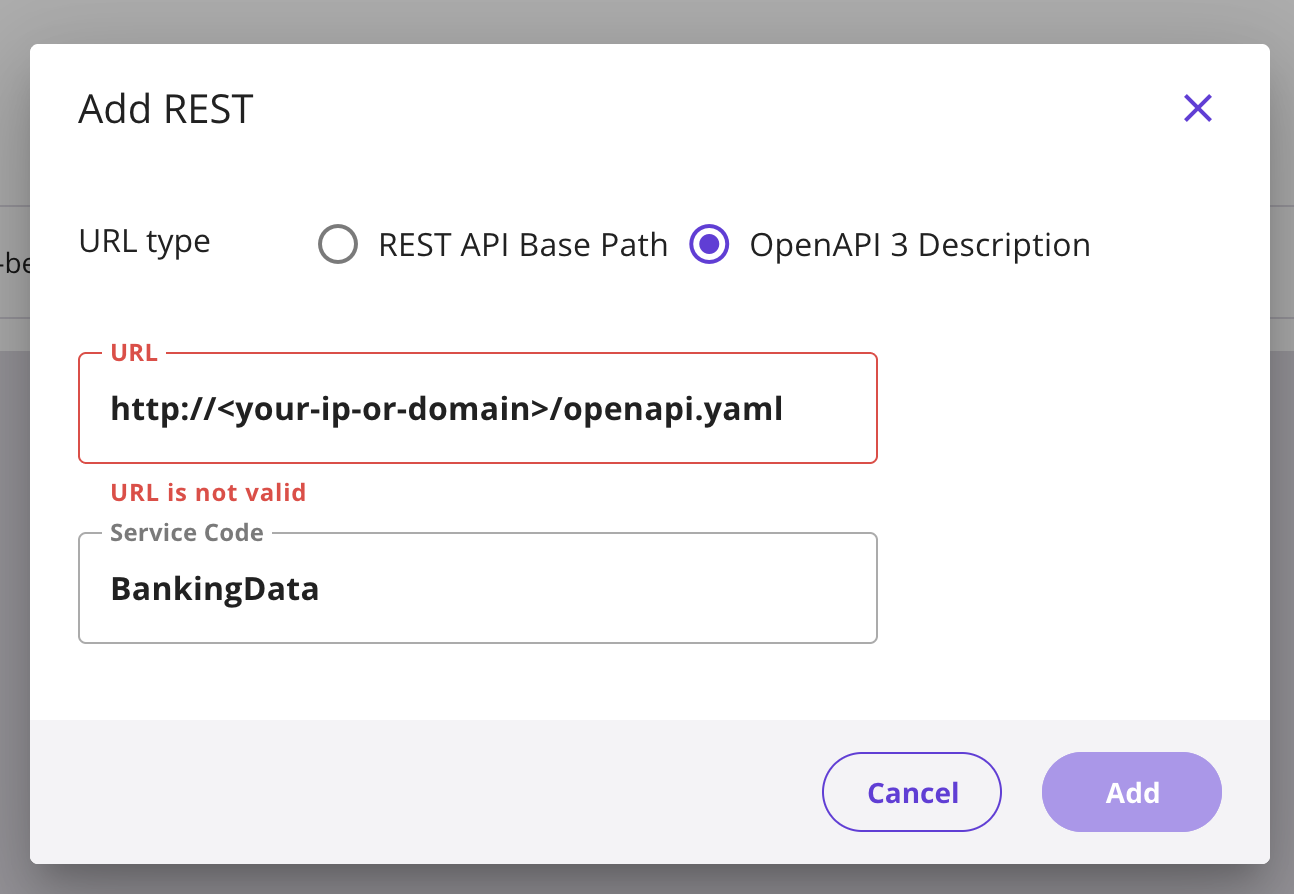
2 Click Save.
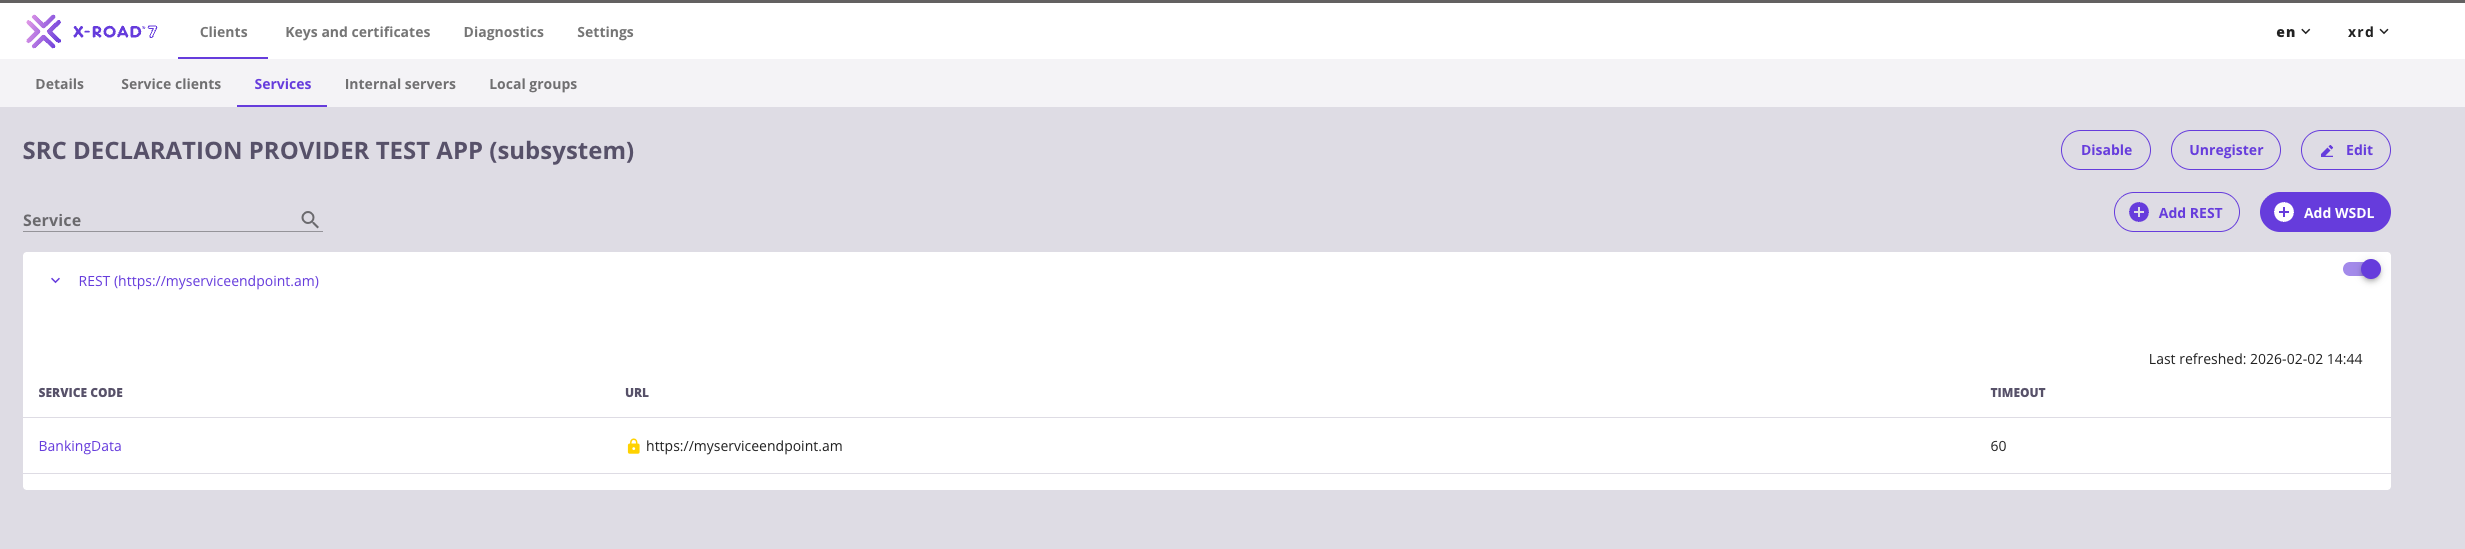
3 After adding, you will see your service listed (initially disabled). Endpoints will be automatically loaded from OpenApi specification.
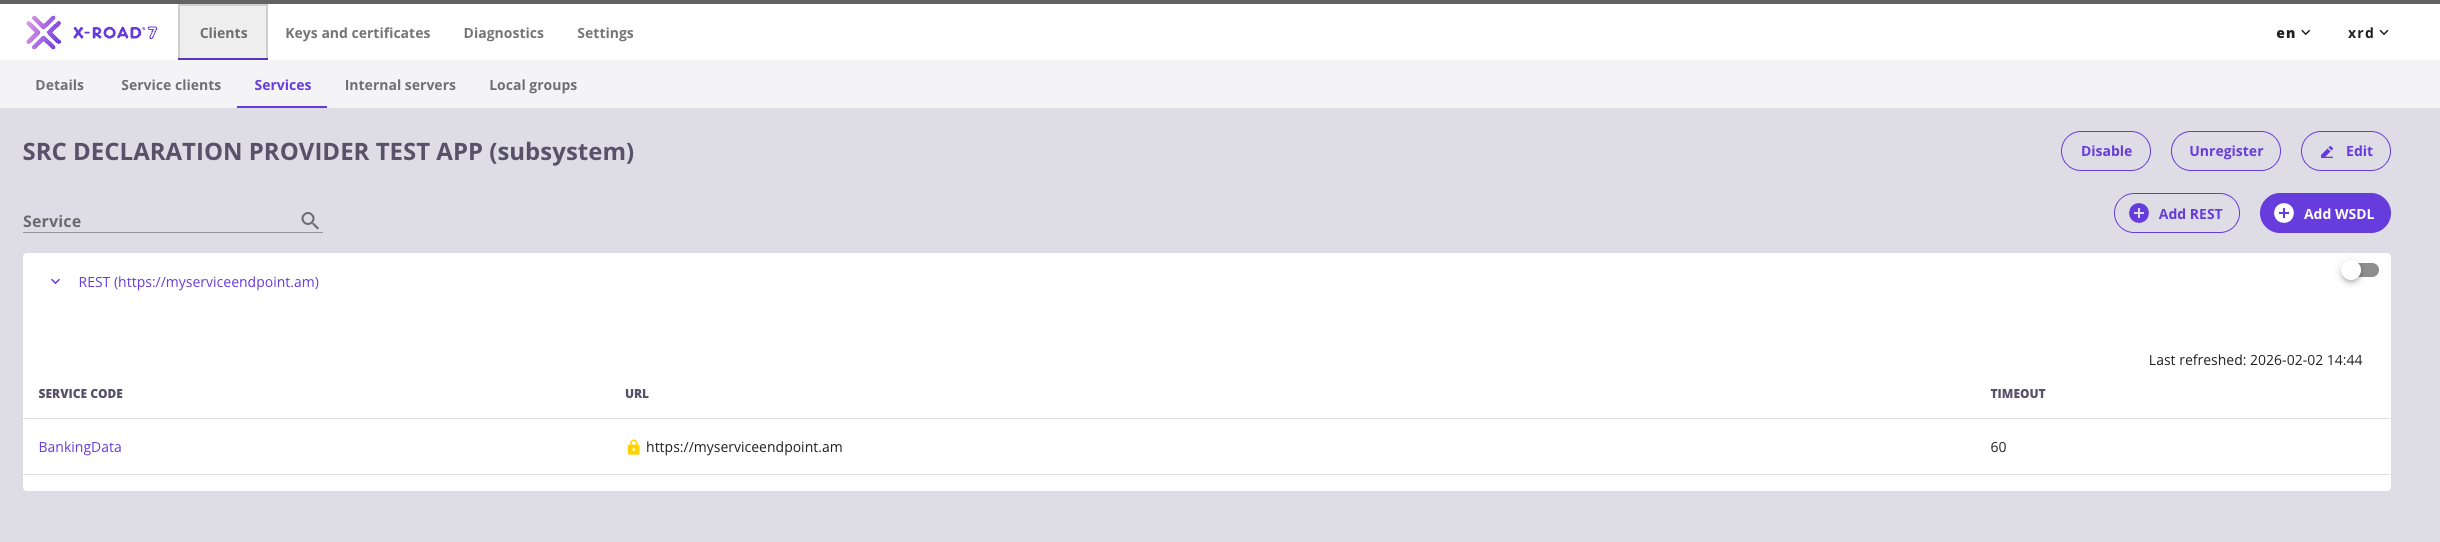
4 Enable the service by clicking the toggle switch to turn it on.
2.5 Grant Access Rights
1 Click on the BankingData service to open its details.
2 Go to the Access Rights tab.
3 Click Save.
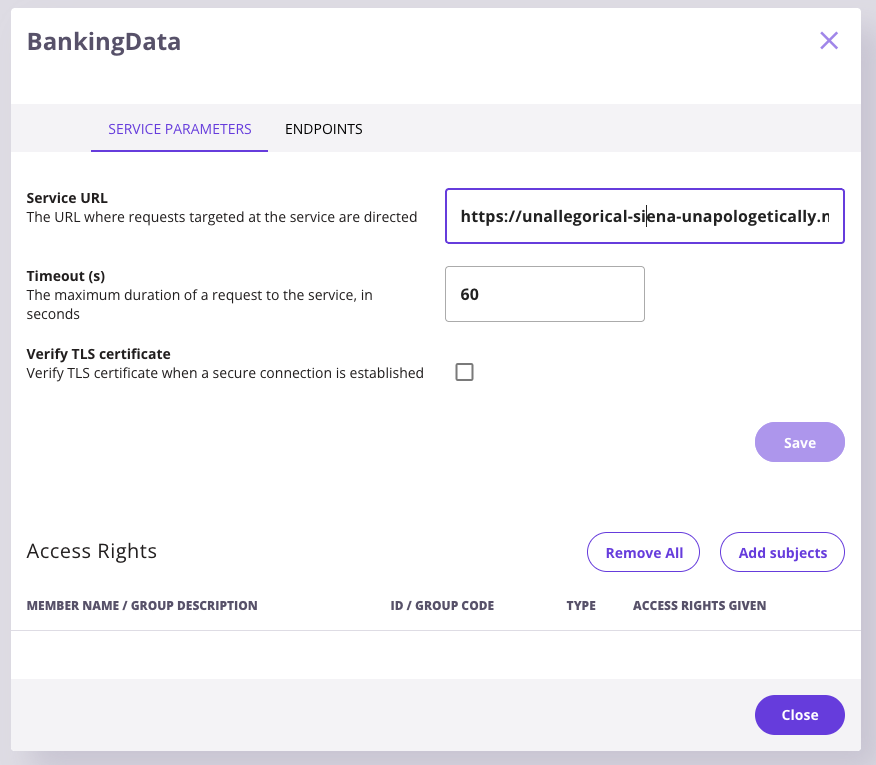
5 Click Add Subjects.
2.6 Search and Select the SRC Consumer Subsystem
1 In the search dialog, fill in the fields to find the SRC subsystem:
| Field | Value |
|---|---|
| Instance | ISAADemo |
| Member Class | GOV |
| Member Code | SRC |
| Subsystem Code | DECLARATION |
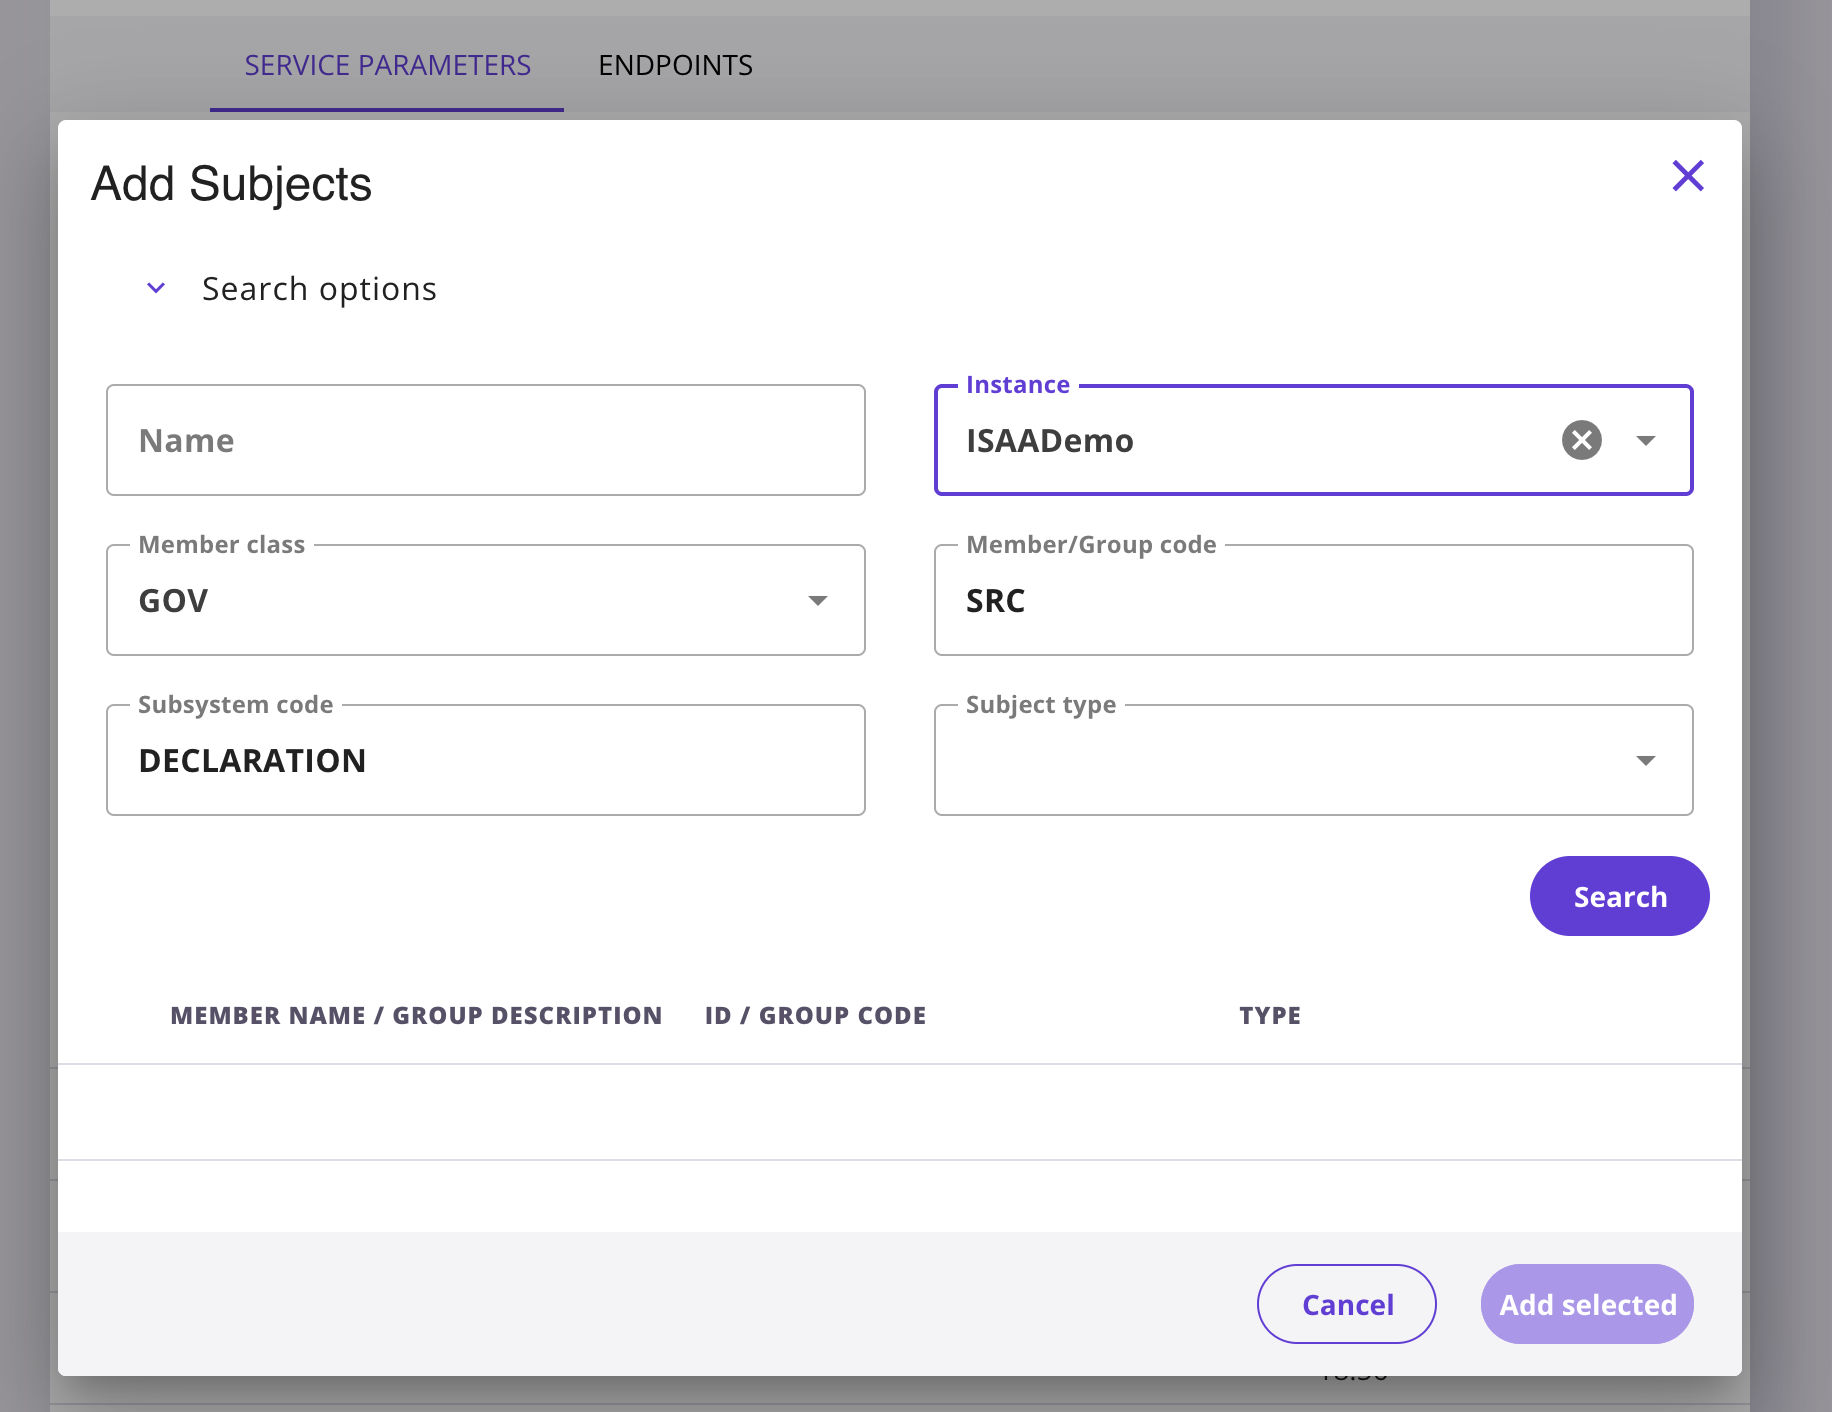
2 Select the DECLARATION subsystem from the search results.
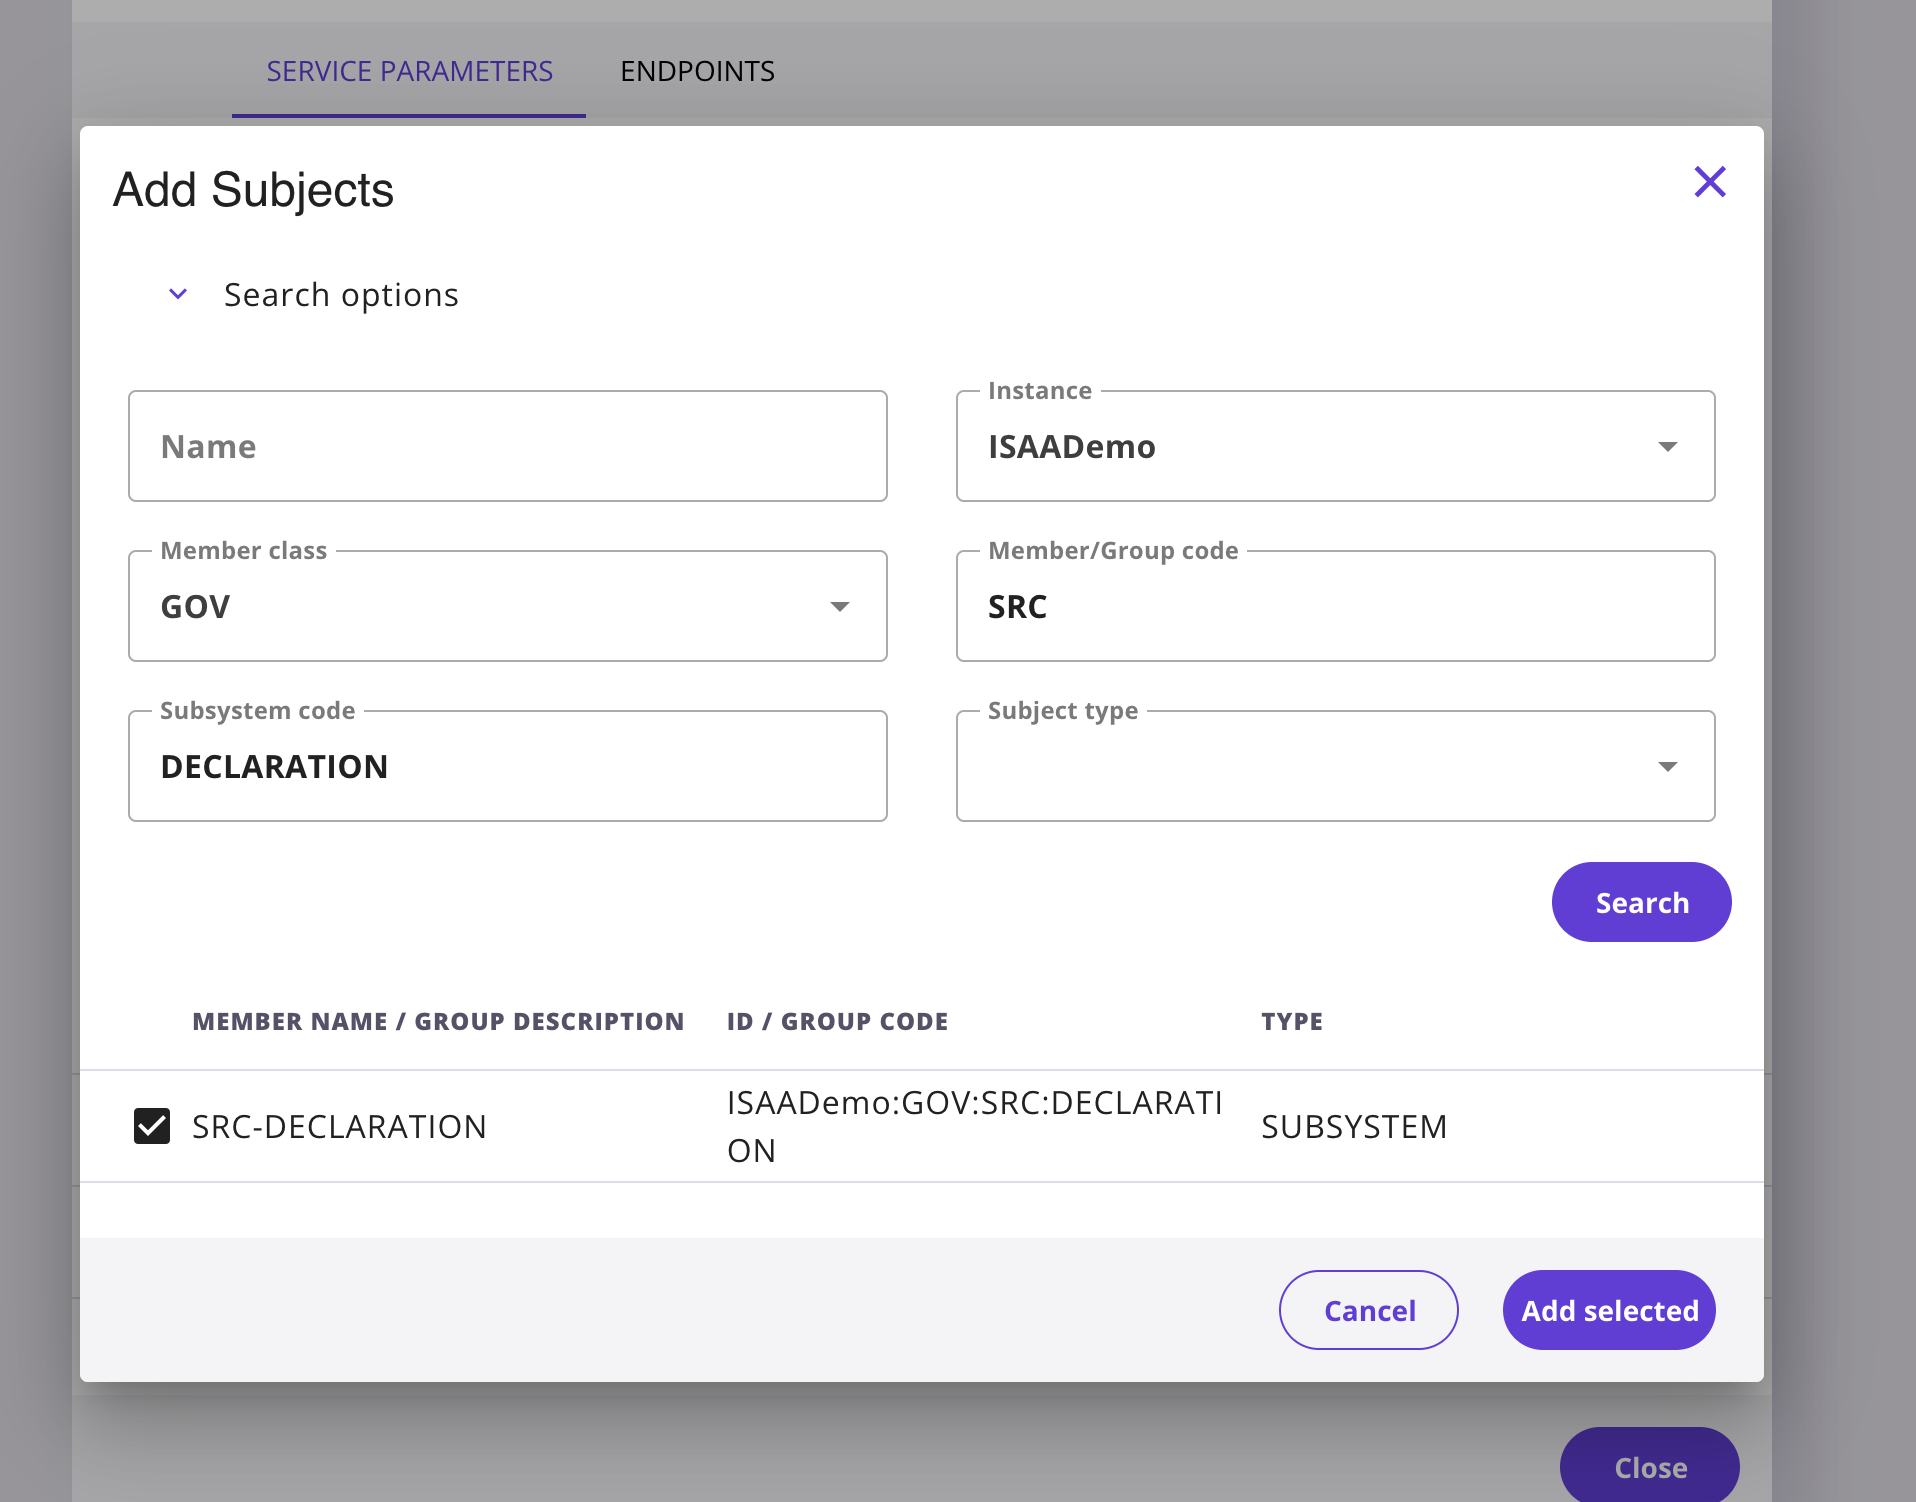
3 Click Add Selected to grant access.
2.7 Configure Connection Type
1 Go to the Internal Servers tab in your subsystem.
2For HTTPS connection you need to configure mTLS between security server and information system (software). . More info: X-Road TLS Certificate Handling
3You can use also HTTP connection for testing purposes.
SslAuthenticationFailed error. Use HTTP for testing environments. For production, configure proper HTTPS with certificates.
2.8 Wait for Subsystem registration Approval
At this stage, the ISAA must approve your Subsystem registration. Your bank needs to wait until confirmation is received before proceeding.

2.9 Verify Connection
After completing all steps, verify that everything is working:
Check Service Status:
- Service should show as enabled (green toggle)
- Access rights should list the SRC consumer subsystem
Test the Connection:
Once your X-Road configuration is complete, go to the SRC Test Console to verify the connection. Authenticate with your API token and follow the testing flow (Initiate Request, Poll Status, Retrieve Data) described below.
X-Road Connection Troubleshooting
For any issues related to X-Road connection, please contact us at x-road@isaa.am.
X-Road Setup Checklist
- Subsystem created under bank client
- Subsystem registered
- REST service added with OpenApi specification
- Service enabled (toggle on)
- Access rights granted to SRC consumer subsystem
- Connection type set appropriately (HTTP/HTTPS)
Testing Flow Overview
The Bank Data API follows a 3-step asynchronous flow:
1 Initiate Request
Send a request with a citizen's PSN (Personal Social Number). The API returns a sessionID to track the request.
POST /src/initiate
{"psn": "1234567890"}
2 Poll Status
Use the sessionID to check if the data is ready. Keep polling until the status changes from PENDING.
POST /src/poll
{"session_id": "<sessionID>"}
3 Retrieve Data
Once the status is READY, retrieve the actual banking data.
POST /src/retrieve
{"psn": "1234567890", "session_id": "<sessionID>"}
Session States
| Status | HTTP Code | Meaning |
|---|---|---|
| PENDING | 202 |
Consent being acquired or data being prepared |
| READY | 200 |
Data is available for retrieval |
| EXPIRED | 404 |
Session expired or not found |
| DENIED | 590 |
Citizen explicitly denied consent |
Sample Test PSNs
Use these PSN values to test different scenarios:
| PSN | Scenario |
|---|---|
1234567890 |
Citizen with banking data (returns sample data) |
9876543210 |
Different citizen with banking data |
5555555555 |
Citizen with all zero values |
1111111111 |
Citizen who will deny consent (DENIED state) |
3333333333 |
Citizen with slow processing (demonstrates PENDING state) |
0000000000 |
No data available (returns 404) |
Using the Test Console
1 Authenticate
Enter your bank API token in the Authentication section on the Test Console page.
2 Enter a PSN
Type one of the sample PSNs above (e.g. 1234567890) in the Citizen PSN field.
3 Click "Initiate Request"
The response panel will show the result and a sessionID will be populated automatically.
4 Click "Poll Status"
Check the session status. If PENDING, wait a moment and poll again.
5 Click "Retrieve Data"
Once the status is READY, retrieve the banking data. The full response will be displayed in the response panel.
Response Data Fields
| Field | Description |
|---|---|
DepositInterest |
Interest earned on deposits (will be in integration first phase) |
DebtSecurityInterest |
Interest from debt securities (mockup data, may be added in further integration phases) |
SecuritiesDeductable |
Deductible amount from securities (mockup data, may be added in further integration phases) |
NonPersonifiedIncome |
Non-personified income amount (mockup data, may be added in further integration phases) |